Friday, 16 January 2015

Rag quilt

I repaired a shirt for my grandfather and fitted some pants for my grandmother and as thanks, the sewing machine was welcome in their living room just a few days after Christmas Eve. (Normally, it's banished until the Christmas decorations come down in early January.).

So naturally, I grabbed the chance to do some sewing. I started on a skirt, but ran out of white thread in the middle of a storm. So I started another project - until I ran out of black thread and the stores weren't open. And a few projects later I sat there with a half-finished skirt, some corset-belt thingies and pieces for three vests, unable to continue on anything. Aughhh.

Luckily I remembered seeing this rag quilt. Since it's a rag quilt, it doesn't really matter what fabric or thread I use, and I found use for scrap fabric and some of the fabric I've held onto for far too long without having any tangible plans on what to do with it. (While I made a pillow from most of it, I had a few scraps from the Hobbit-inspired morning gown I started last year.)


My teachers (both professional seamstresses) would probably have had something to say about these raw edges. Hopefully it'll look better after washing and fraying.
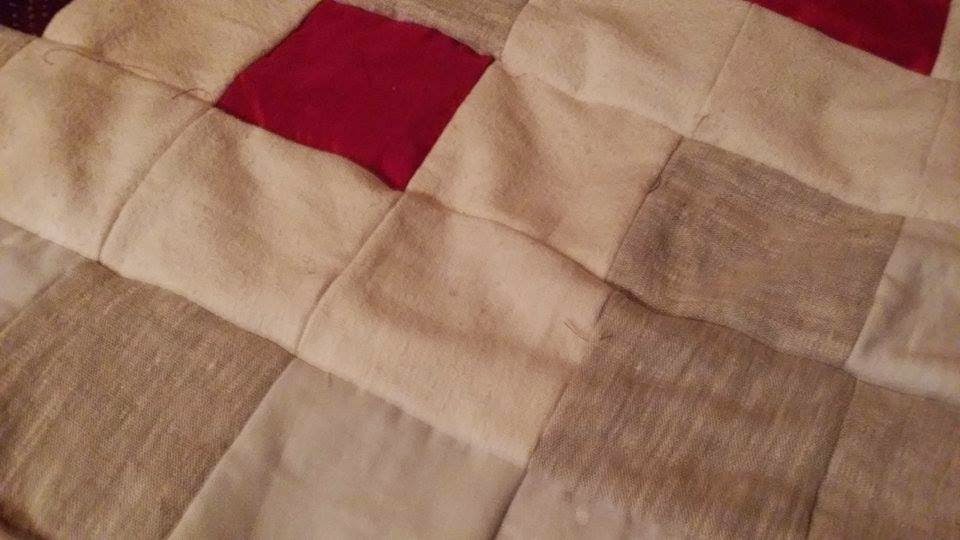
For once, the wrong side looks pretty.

It's half-finished now and I'm hoping to finish it next time I'm home. I've sworn to myself that this will not turn into one of those projects I start when I'm at home and then forget/throw away/take apart/redesign/give away next time I'm back. (So if you could keep an eye on me during Easter so that I can't be sneaky and do any of those things, that would be very much appreciated.)

Sunday, 11 January 2015

Viking embroidery: wolf contortionist

The wolf contortionists have been finished for a while. As this project was small enough to fit in my bag, I've taken it with me to school and embroidered in breaks or when taking the metro into town. (When I was going home one day, there was an elderly lady who sat down beside me to talk about embroidery.)

As usual, I've used woolen thread. The wheat-coloured thread comes from Skaar Tekstil, the rest is vintage, a gift from my grandmother. She had a lot of remnant thread lying around from when she embroidered national costumes in the 90's.

The motif is upside down in this pic. Oops.

The hardest part of an embroidery project is choosing colours. The vikings were colourful people, and personally I'm not. I think I should have chosen a stronger colour for the contouring?

I like keeping things tidy and this is acceptable. Later, I'm going to try another type of stitch,
that in theory will make the motif look the same on both sides.

Finished.

Tuesday, 30 December 2014

Mockingjay: Capitol Couture

Went to see Mockingjay with friends and had to dress up for the occasion. I'm with the districts, of course, but costume-wise I find it a lot more tempting to dress up as an overpriveleged child-murderer exquisitely dressed Capitol fashionista.

In the movies, Capitol clothing is very sculptural and extravagant, tailored deliciosusly close to the body. I wanted to keep a sense of haute couture instead of making a costume, so I aimed for something tightfitting with unusual details.


I bought a black organza skirt and a tight, tight velvet dress second hand and combined them. The dress was very tight, so I had to add a gore to be able to fit it over my hips. Look closely under the organza - the gore fabric is a rubbery pleather type thing that stands out against the red velvet. (I thought it a nice detail, even if it barely shows. 


While I was working, I realised having a mannequin is the best thing ever. It's not always easy to fit anything when you're wearing it.

Here I've pinned the dress onto one of the mannequins at school, just playing around with different details.

I was in love with the hip-detail from the left picture, but when I removed the dress from the mannequin, the needles fell out and after three failed attempts at recreating it, I decided to go for some big fucking rosettes instead. (More is more.)

Pinterest was life-saving while searching for inspiration. I found these tights, and made a sort-of copy with flatbacked rhinestones and beads. The best way to get the rhinestones on was to glue them on while wearing the tights. Glue+hairy legs is not the best combination on any day, and the textile adhesive I used didn't wash off with water, so I walked around with glue on my legs for a few days. Very much haute couture.

I'll post better pics when I get them.
In addition to the dress and tights, I forced my feet into shoes without heels from Bianco, wrangled my hair into submission, used more makeup than I usually go through in six months and even bothered with fake eyelashes (without gluing my eyes shut, go me). I painted my hands black seeing as some Capitol people dye their skin,. (Using waterbased makeup for my hands was not the best idea ever, when we stepped outside, it started raining.)

But so much worth it. The dress doubled as Christmas dress and the movie - just fantastic.

Friday, 5 December 2014

La Carlotta: ROCOCO GOWN O'DOOM


All t3h pink.
One of my next projects would have made fourteen year old goth me reach for matches to kill the thing with fire. If anyone's wondering what costume the pink garters are for, here's the answer.

The gown is used by Carlotta Guidicelli in the 2004 movie Phantom of the Opera, while they're performing the fictional opera Il Muto.


I'm going to build this monster slowly, because with all the sewing I do for school, I'm pretty sure I won't have much time for my own projects. (If anyone sees my crying in a corner I'm 110% sure this is gonna be the reason.)

Wednesday, 12 November 2014

Tutorial: Dwarf boot covers


Someone asked me about how I'd made my dwarf lady boots, so I documented the process when I made new show covers. The construction is super easy, but I'll explain everything in case there is anyone who haven't worked with foam before.

This is the second time I'm making new covers, so be aware that since they are made from foam, they won't last forever. But they are cheap and pretty easy to make. My last pair lasted four days through intense wear and tear, and if you're careful with them, they'll last longer.

I found my base shoes second hand, so I can't tell you where to get them, sorry.


Before you start, stuff your boots with newspaper or something so they keep their shape while you're working. Put masking tape where you want the cover to go. Draw your design (or just copy mine). Try to get it symmetrical.


This is my pattern. You can cut it out in paper or cardboard if you know you are going to make them more than once. As for me, I appreciate the masking tape pattern that sticks to the foam while I'm cutting it.


Cut out your pattern in foam. You might want to add some "seam allowance" to the parts that will overlap. You can always trim it later. Try your pattern on the shoe to make sure it fits.

This was my first pair that died really quickly. Boo, pink foam.
Notice that I am using BLACK FOAM. I am a clutz and I know that I will mange to scuff the paint off them no matter what. But when the foam is black, the scuff marks show less and the shoes just look like they've been trekking through Middle-Earth (authentic!) and I don't get bullied by nasty Elves for having neon pink spots on my shoes. 


Dwarves seem to like geometrical details. Create interest with texture and patterns. I have carved details into the foam with a pen. It's also possible to add raised detail with puffy paint or extra foam parts.

The pattern I've used on top of the shoe is from Thorin's dwarven sword. The sides are decorated with norse bindrunes. There are loads of Dwarven patterns to take inspiration from.


Glue on a clean surface - clean the shoes if they've been used outside. Scratch the surface of the shoes with f. ex. sanding paper to give the glue extra purchase. There are loads of different glues to choose from - if you're using contact adhesive, do yourself a favour and choose the less toxic kind that doesn't give you cancer. If you're using hot glue, make sure to use only a thin layer of glue so that it doesn't show through the foam. Here I've used school glue 'cause that was all I had lying around.

Foam is too porous to paint, so you'll have to seal it with watered down glue.

If you haven't used black foam, now is a good time to paint the whole thing black, just to have an even primer. Dwarf-boots usually have covers in metal or leather, so that's what you want to mimic. When painting props I usually paint the whole thing in a base colour and add shadows around raised details before I distress/age it.

And this is what they look like after a day at con.
(Exhausted dwarf cosplayer not shown.)
Paint until you're satisfied, let dry and then you're ready to kick some Elf butt! (Though, be ready to run away from offended Elves. Mahal, it's a good thing we Dwarves are natural sprinters.)

Questions? 

Sunday, 9 November 2014

Wagner valkyrie, so far


The shield is still a work in progress. I have finished the woodwork without shedding more blood. Now it needs covering, shield boss and some decoration.


The deerskin I planned to cover it with is too small. So I'll have to decide whether to piece it together so it covers the whole thing or to just cover it with something else, linen perhaps. Decisions...

Made a new headpiece because I wasn't pleased with the first one.

The arm bracer was the last thing I made before I left home for school and studying. I continued my saga of pilfering Tolkien's world for decoration: the tree is this Telperion with the roots of the Tree of Gondor. So far, this is my favourite thing I've made with foam.


The armour parts are finished, I just need to glue on a few leather straps so they're wearable. I think I'll repaint the pauldron - it as the first thing I made and it shows (later I figured out that drybrushing i the answer on how to make the gold paint look like real metal).


And at last, because I was at home when I worked with this - look at this pretty kitteh who stalks the garden at home. So pretty.

Saturday, 18 October 2014

Viking embroidery

Embroidery is one of the things I'd really like to get better at, so when I was stuck in the middle of nowhere with nothing else to do, I used the time to practise.


The pattern I chose was a wolf, but with the stylized design and the colours I chose, the result didn't turn out very... wolf-ish. So I've decided that these are vicious viking corgies. Don't laugh, they are really bloodthirsty.


I've started on another one. I'm calling this pattern Wolf contortionist is stuck and would like some help, don't just stand there.
